Schedule Views — Minimum Row Height and Cell Padding
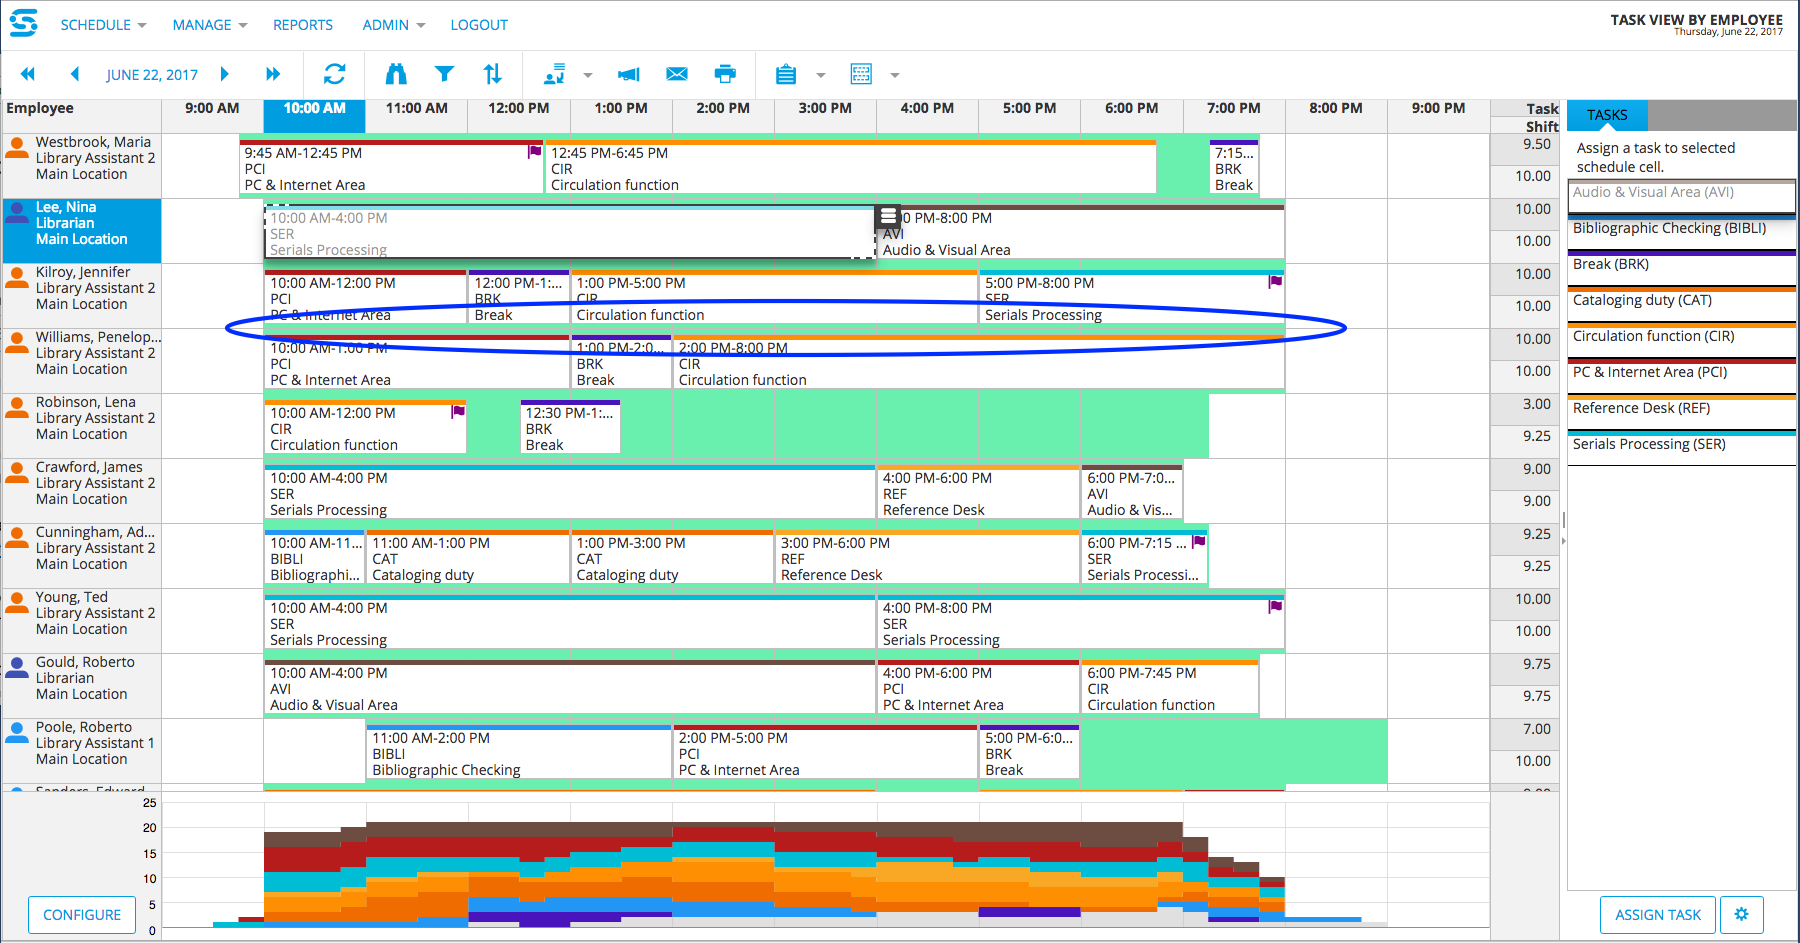
In a recent update to Snap Schedule 365, we made an improvement to the Task View by Employee that reduced the size of task assignments by 10 pixels (5 pixels of padding on both the top and bottom). We did this to allow the underlying shift assignment to be visible even when the task assignments cover the entire shift. An example of that extra padding is shown below.
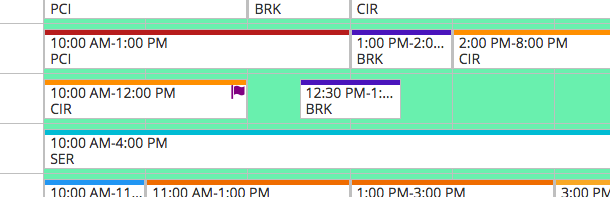
We’ve heard from a number of customers that our change to the software meant that less information in each task assignment could be displayed than before. The loss of 10 pixels effectively reduced by one the number of lines of text that could fit in the task assignment. For example, in the “More Detail” mode, where you used to see three lines of text in each task assignment, you could now only see two. After our update, your display might look like this:
The reason this happened is because previously, the Minimum Row Height setting in the Task View by Employee was set to a default of 50 pixels. With the change, we’ve increased the default value to 65 pixels to ensure all three lines of text are displayed for new schedules. The problem is that customers with existing schedules would have already locked in their Minimum Row Height, so they would see a “loss” of one line of text.
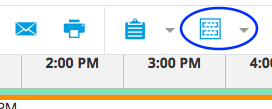
The good news is this a problem that is easily remedied, and it provides us an opportunity to point out a subtle but powerful feature of Snap Schedule 365. Clicking on the “Configure Schedule Details” toolbar button allows you to specify a myriad of settings for the current view. This button is available in all schedule views, and looks like the image on the right.
The “Configure Schedule Details” dialog allows you to tweak each schedule view independently, and it is saved across your sessions — so once you set your preferences, they will be retrieved and used whenever you login, no matter which device you are using.
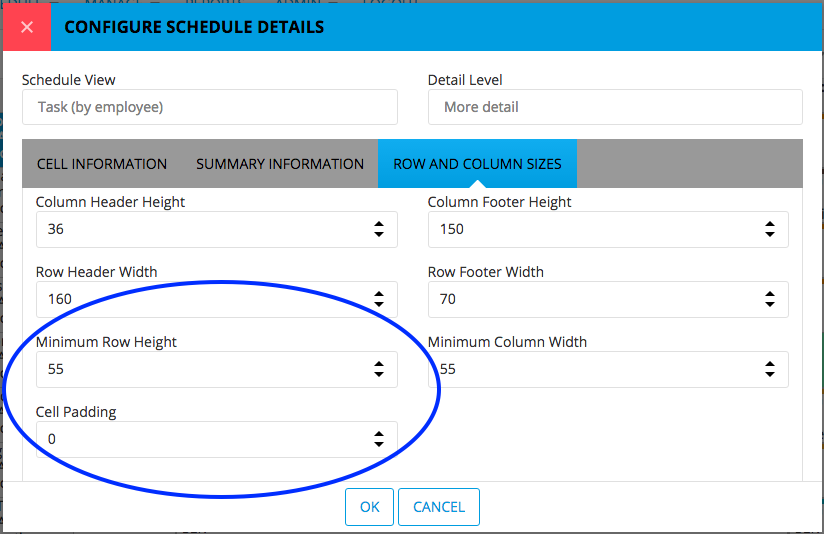
There are lots of settings you can play with, but the items of interest today are found on the third tab, “Row and Column Sizes”. On that tab, there is a setting for Minimum Row Height and a setting for Cell Padding. To be able to see more lines of text on each row, you can simply increase the Minimum Row Height. We would recommend an increase of 10 – 15 pixels for each additional line you would like to be able to see, so setting the value to 65, for instance, should give you space enough for three lines of text. Alternatively, you can reduce the Cell Padding setting to decrease the amount of the underlying shift assignment that is displayed. Setting the Cell Padding to 0, for instance, will not allow any of the underlying shift assignment to be seen — this is the configuration you might be used to before our software change.
It’s as simple as that! We do apologize for any confusion we caused, and in future updates, we’ll strive to minimize any disruptive changes. We sincerely thank you for all of your comments and suggestions — it really is the best way for us to grow Snap Schedule 365.