Using Custom Fields With Your Data
Snap Schedule 365 gives you the ability to define all sorts of schedule-related data, but there are still instances when you need to input scheduling data that Snap Schedule 365 does not directly support. To capture this requirement, Snap Schedule 365 lets you define new fields for your schedule data. Up to ten text fields, five date fields, five numeric fields, and five checkboxes can be defined for each schedule data type. You can then set values, which are unique to the data record, in these new fields.
This guide will demonstrate how to set custom fields for employees, but you can also do similar steps to set custom fields for your shifts, locations, and tasks. We will use “Social Security Number” as an example field that Snap Schedule 365 does not include by default.
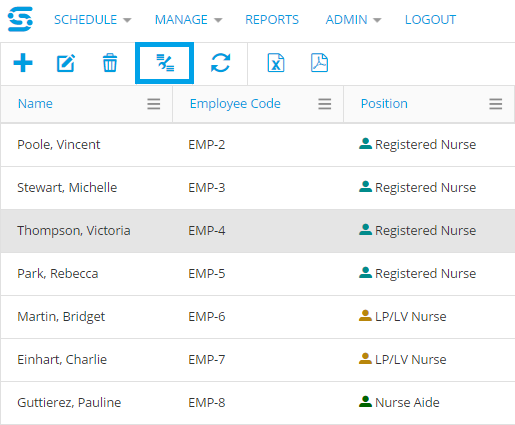
- Begin by navigating to Manage\Employees to see your employee list.
- Click on the Custom Fields icon in the menu bar.
- Navigate to Numeric Fields and make sure that Custom Number 1 is checked (i.e the custom field is enabled in the system). By default, Snap Schedule 365 enables all custom fields for you.
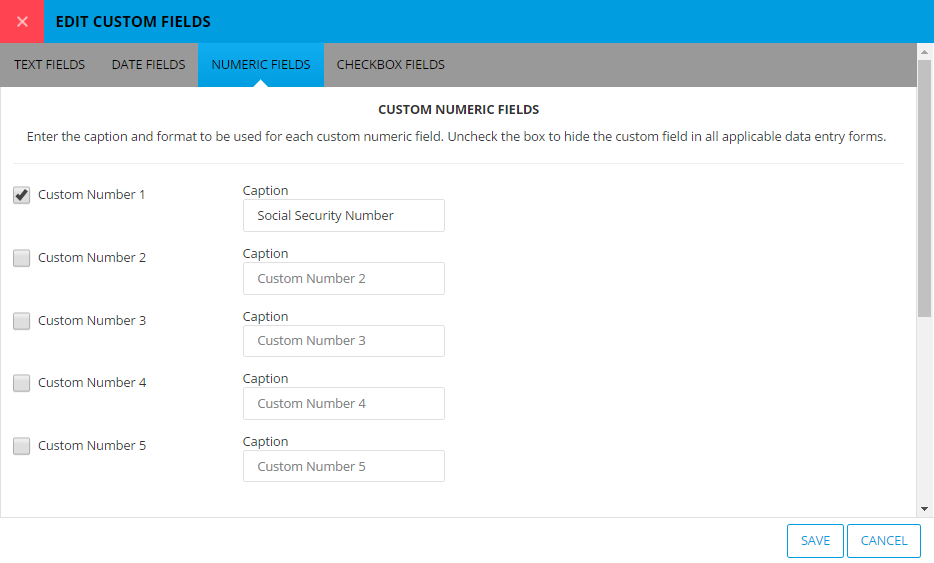
- Type in a caption for the custom field. This should not be a custom field value. In our scenario, we will input “Social Security Number” so that all other employees in the database now have access to this new data field. All employees are not required to hold values for this custom field.
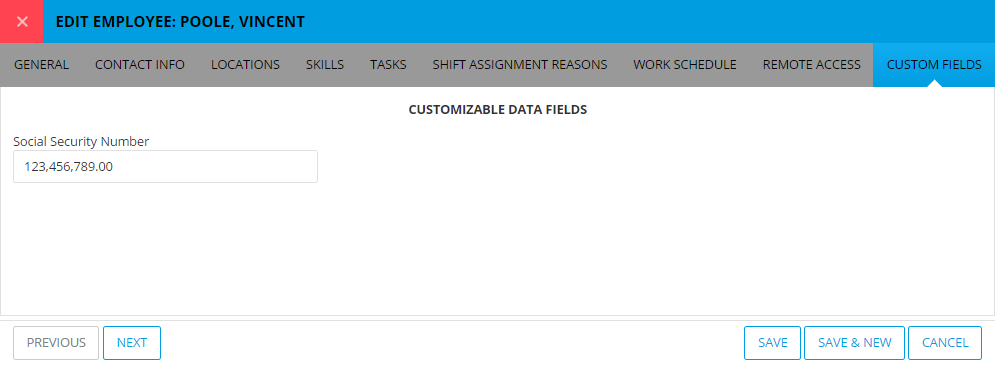
- The final step is to double-click on any employee in the employee list and navigate to the Custom Fields tab at the top of the popup window. The new custom field should appear in the window. At this point, you can now enter a value for the custom field. Note that this value is unique to the data record (an individual employee is the data record in this case).